ICD-10 Browser and Bottom Pane Functions
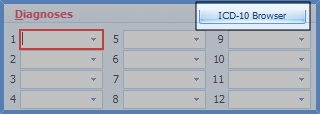
- Open the ICD-10 Browser by clicking the "ICD-10 Browser" button in the Diagnosis Code section of the Encounter Editor
- The ICD-10 Browser will open. Notice the added section at the bottom of the screen. You will use this section to choose, modify, and arrange your chosen ICD-10 codes.
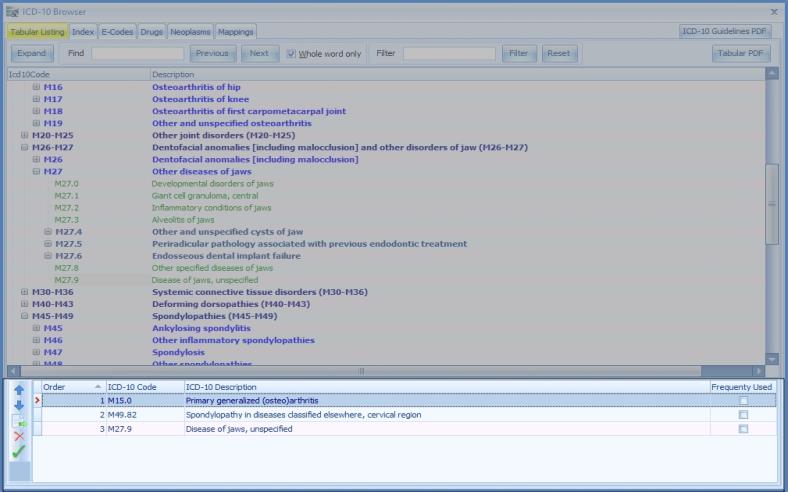
- Simply search and find the green-colored billable code that you would like to use (refer to earlier in this document for thorough details on using the ICD-10 Browser). A simple double-click or drag-and-drop of the desired code to the bottom section will add the ICD-10 code to the list of Diagnosis Codes for the encounter. You can modify, rearrange, delete, and save the code list by using the buttons to the left.
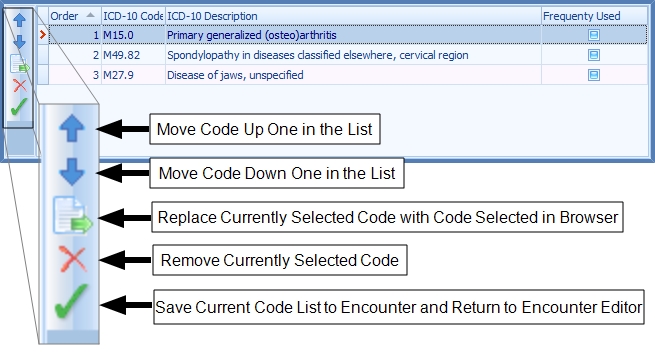
- The Frequently Used check box: If you notice that to the right-hand side of the ICD-10 Description there is a box labeled "Frequently Used". If the code is already in your practice's Diagnosis Code Records then the box can not be modified. However, if the code is not currently in your list and you would like it to be added, simply select the code desired at the bottom and press "Spacebar" to check/uncheck the box . By checking the box and clicking save you will add the code to your local records list (which will make the code appear in the drop-down menu when choosing codes via the first method shown).
- When you are satisfied with the chosen codes, simply click the green check mark to save the codes to your encounter and return to the Encounter Editor screen. If you would like to cancel any changes you have made, simply click the close "X" on the upper right hand side of the window and any changes made will NOT be saved.
- If you edit the positioning of codes within the ICD-10 Browser after already entering Services, remember to double-check the accuracy of the diagnosis code pointers when you return to the Encounter Editor screen.
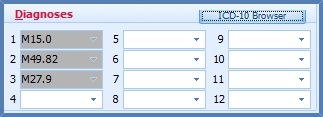
- The codes that have been entered via the ICD-10 Browser will appear in gray and can only be modified and deleted by returning to the ICD-10 Browser screen and completing the necessary edits there.
- Proceed by filling out the rest of the information for the Encounter. Pressing Save will save the encounter and put any insurance claims (if applicable) in queue for claim generation.
Previous: Creating Diagnosis Code Records for ICD-10 Codes | Next: Sign Up For Code Correct